 MeshPit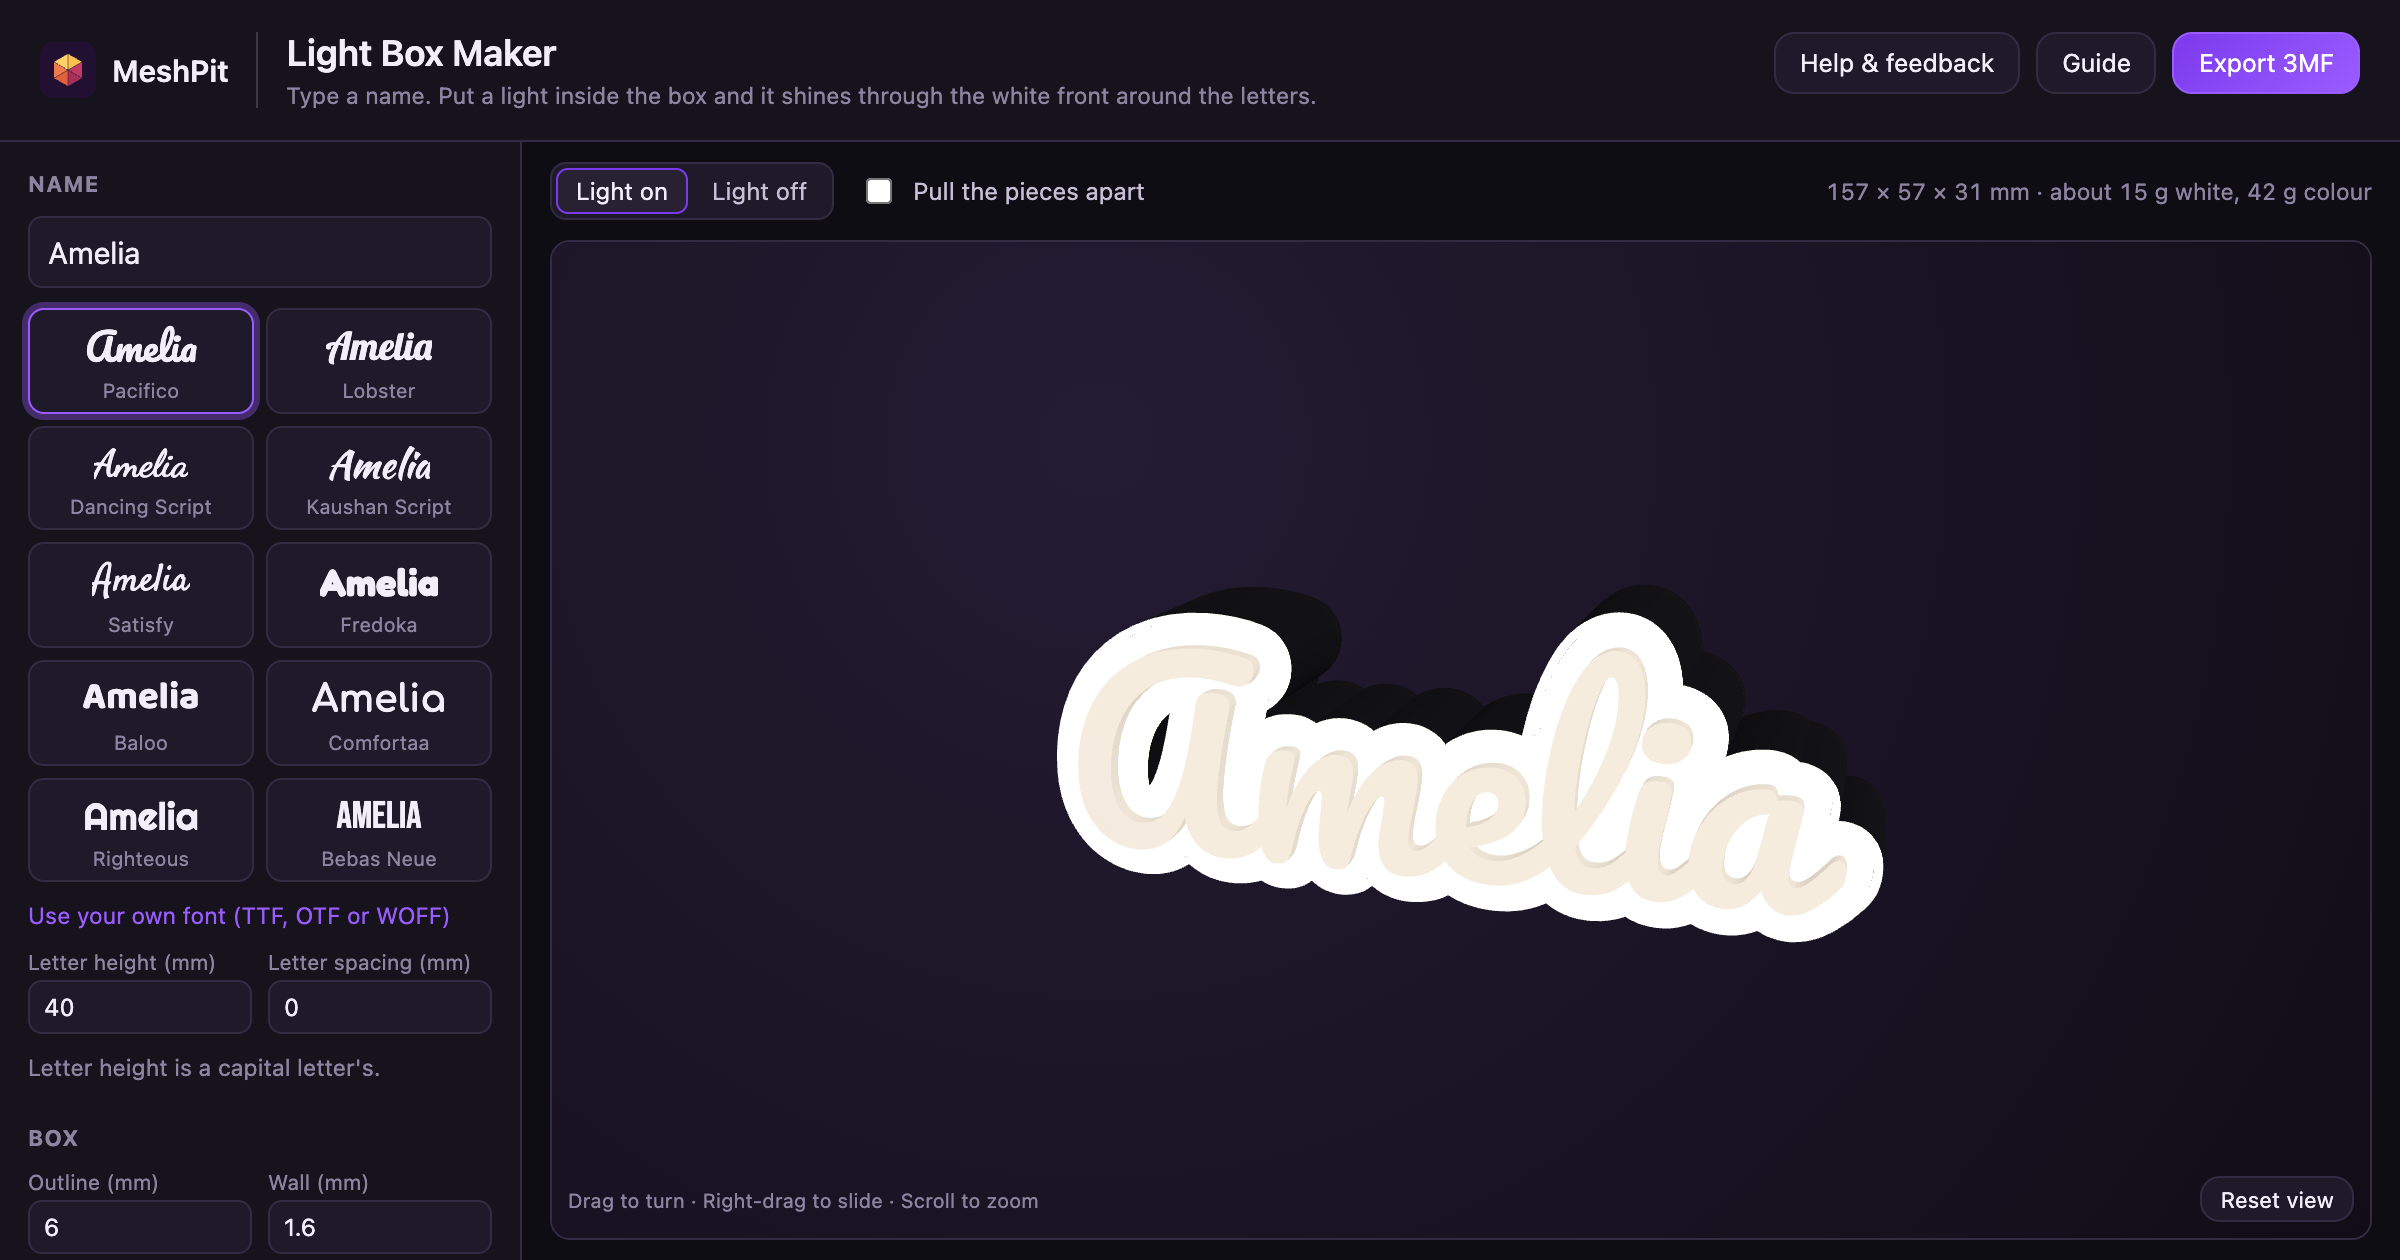
1. Type the name and pick a font
Open the Light Box Maker and type the name under Name. It takes one line of up to 40 characters. Each font button shows your name in that font, so you can compare them before you pick one.
The first five fonts are scripts: Pacifico, Lobster, Dancing Script, Kaushan Script and Satisfy. Their letters join, so the name prints as one piece. In Fredoka, Baloo, Comfortaa, Righteous and Bebas Neue the letters stand apart and print as separate pieces. To use a font of your own, click Use your own font and open a TTF, OTF or WOFF file. If a font has no shape for a letter you typed, the Light Box Maker leaves it out and tells you which.
For a name in Hebrew or Arabic, pick Rubik, which has both, Suez One for Hebrew or Lalezar for Arabic. The letters of each Arabic word join, so the word prints as one piece. The buttons under the name set which way it reads. Auto follows the first letter, so a Hebrew or Arabic name reads right to left. Left to right and Right to left matter when a name mixes both kinds of letters: they decide which word comes first. Numbers always read left to right.
Letter height is the height of a capital letter, 40 mm to start and up to 200 mm. Lowercase letters and descenders scale with it. Letter spacing adds space between the letters, and a negative value pulls them together.
2. Shape the box
The box follows the outline of the letters, grown outwards on every side. Under Box:
- Outline is how far the box reaches past the letters, 6 mm to start. When letters sit far apart, their outlines may not meet, and the box splits into separate boxes. The Light Box Maker warns you. A wider outline, tighter spacing or a flat base joins them again.
- Wall is the thickness of the side walls, 1.6 mm to start. Keep the outline at least 1 mm wider than the wall, or the walls cover the edges of the letters and light can't reach them.
- Light depth is the room inside for the light, 25 mm to start. Measure your LED strip or module and leave a few millimetres over.
- Flat base fills in below the letters down to a flat bottom, so the sign stands on a shelf and every letter joins the same box.
- Box colour sets the colour of the walls and lid. The letters and the front are always white, because the light has to pass through them.
3. Set the front and the letters
These settings decide how the sign looks when it's lit and how the letters fit. The defaults suit white PLA and a 0.4 mm nozzle.
| Setting | Default | What it does |
|---|---|---|
| Front | 1 mm | The white layer the light shines through. Above 1.6 mm little light gets through, and 0.8 to 1.2 mm works best. |
| Letters | 3 mm | How far the letters stand out from the front. Thicker letters let less light through, so they read darker against the glowing front. |
| 0.4 mm | A shallow recess the shape of the letters in the front, which lines them up and holds loose letters in place. 0 leaves the front flat. | |
| Fit play | 0.2 mm | The gap around the letters in the pocket and around the lid's lip in the box. Raise it if the parts are tight, and lower it if they're loose. |
4. Fit the lid and the cable hole
The lid closes the back of the box. Its lip reaches 4 mm into the box and holds the lid in place, and a Lip depth of 0 makes a flat lid. Lid sets the plate's thickness, 2 mm to start.
With Hole for the light's cable ticked, the lid gets a round hole, 6 mm across to start. Place it low in the middle puts it as low as it fits near the middle, clear of the lip. Untick it to place the hole yourself, measured from the middle of the box. The starting size fits a thin cable. If the plug has to pass through, make the hole wider, up to 20 mm. A USB-A plug needs about 16 mm.
5. Check the preview
Light on shows the sign glowing through its front, and Light off shows it unlit. Tick Pull the pieces apart to see the letters, box and lid separately. Above the preview are the sign's size and an estimate of the white and coloured filament it needs.
Warnings appear under the preview, for example when the box is bigger than a 256 mm print bed or the cable hole cuts through the lip. Reset sizes puts every size back to its default and keeps your name and font.
6. Export and print
Click Export 3MF for one file with all three pieces. It opens in Bambu Studio and OrcaSlicer with each piece on its own plate. Filament 1 prints the letters and the front in white, and filament 2 prints the walls and lid in the box colour. The file is set up for a Bambu Lab X1 Carbon with a 0.4 mm nozzle, so pick your own printer after you open it.
For another slicer, or a printer with one colour, export each piece as an STL from the list under Pieces. None of them needs supports:
- The letters print flat.
- The box prints on its front, with the walls rising from it. On a single-colour printer, add a filament change at 1 mm, the height of the front, so the walls print in your second colour.
- The lid prints with its lip facing up.
- Print the letters and the box with 100% infill, so the front and letters are solid and no infill pattern shows when the light is on.
7. Put it together
Glue the letters into the pocket in the front. Stick an LED strip or module to the inside of the lid, facing the front, and pass its cable out through the hole. Then press the lid into the back of the box.
Questions
Do I need a multi-colour printer to make a name light box?
No. The letters, the lid and the box are separate pieces, so a single-colour printer can print the letters in white and the lid in any colour. The box prints on its front, and the first 1 mm is the white front. Export the box as an STL and add a filament change at that height in your slicer, and the walls print in the second colour.
What light goes inside a 3D-printed name sign?
A USB LED strip or a small LED module. Stick it to the inside of the lid, facing the front, and run the cable out through the hole in the lid. The box leaves 25 mm for the light to start with. A deeper box spreads the light more evenly across the front.
Which fonts work best for a name light box?
Script fonts like Pacifico and Lobster join the letters, so the name prints as one piece and drops into the front in one go. In fonts whose letters stand apart, each letter prints on its own and the pocket in the front holds it in place.
Can I make a name light box in Hebrew or Arabic?
Yes. Rubik has Hebrew and Arabic letters, Suez One has Hebrew and Lalezar has Arabic, or you can open a font of your own. The name reads right to left, and the letters of each Arabic word join, so the word prints as one piece.
Is the Light Box Maker free?
Yes. It builds the pieces in your browser, so there is no sign-in and no limit on exports. A font file you open stays on your computer.